Flashing New Firmware
Cocoa Press Firmware
Download the latest Cocoa Press firmware from here.
Setting Update Mode
- Before flashing, be sure that your printer is completely off.
- Hold the erase button inside the USB panel on the left side of the printer.
- Turn the printer on.
- After three seconds, release the erase button.
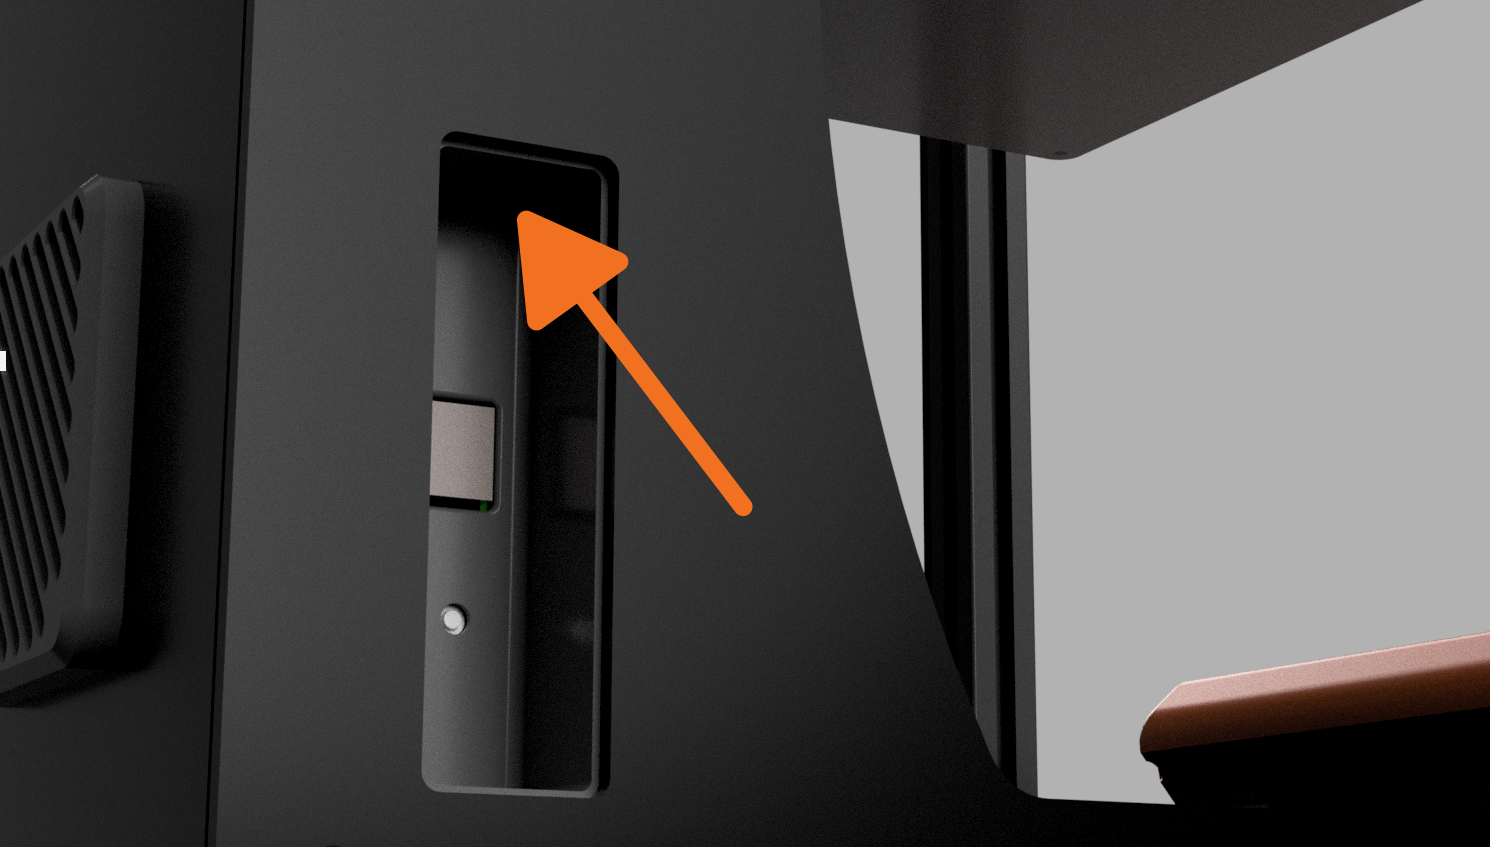
- Connect the printer to your computer via USB.
Info
To ensure that you followed the above setup steps correctly, you'll want to ensure that your Cocoa Press' screen is not on. Nothing showing on the screen means it's in update mode.
Please select the type of computer you have before proceeding.
To update the firmware on your printer, you'll need to use Shumatech BOSSA, the preferred flashing tool for the brains of the Cocoa Press.
Download BOSSA
Download the preferred version of BOSSA for your computer from GitHub here.
Caution
There are known issues with desktop BOSSA not working correctly on macOS M1/M2 computers. Please see the below steps for a workaround.
If you're a technical user, there appears to be a workaround listed here to use desktop BOSSA, but you should only use this fix if you know what you're doing.
When opening BOSSA, it should look like this.
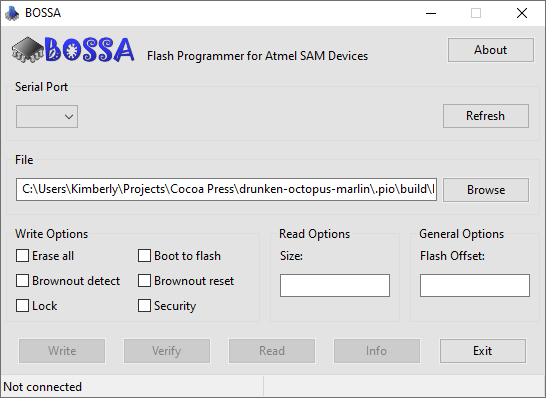
Use the "File" section to choose the firmware for the printer.
Select the appropriate serial port for your printer.
Info
BOSSA will show "connected" with a string of letters and numbers including "SAM" if it's the correct connected device.
Select "Erase All" and "Boot to flash", then "Write" to put the new firmware on your printer.
To flash to your Macintosh, SynDaver has made a web slicer that includes flashing firmware tools for the type of control board your Cocoa Press uses. In short, it can be used to update your printer's firmware same as BOSSA above can be.
Note
This beta tool only works on Chrome due to the use of webUSB. Safari and Firefox don't yet support WebUSB.
Open the SynDaver Web Slicer Beta here.
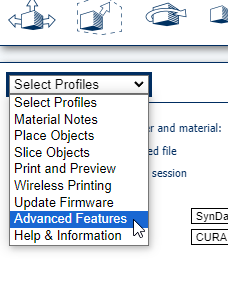
In the left-pane, use the dropdown to select "Advanced Features".
Expand the "Custom Firmware Update" button and use the file picker to select the CocoaPress.bin firmware downloaded earlier.
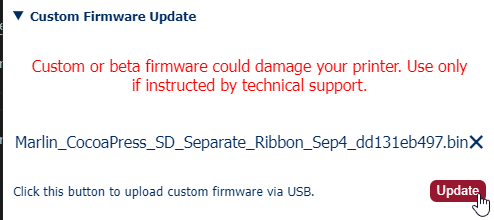
Click the "Update" button, and select the serial port attached to your Cocoa Press.
Info
You may need to select the serial port, click "OK", and then repeat the process. This is due to a serial port permissions change in Chrome.